keskiviikko 30. joulukuuta 2015

Katsaus cosplayvuoteen 2015

Conit (tai vastaavat), joihin osallistuin


Puvut


Tänä vuonna tuli tehtyä viisi uutta pukua ja ohhoi, olipahan vuosi. :D Avatar oli selvästi tämän vuoden se-juttu, mistä olen oikeasti onnellisin ikinä. Olen tyypillisesti sitä lajia, että hurahtaessani johonkin asiaan fanitan sitä lähinnä itse omassa hiljaisuudessani, mutta Avatar toi mukanaan ihan valtavan ihanan porukan ja ryhmän, jonka kanssa tuli vietettyä aikaa tänä vuonna paljon. Sokka (Avatar: The Last Airbender) oli tämän vuoden avaava hahmo pukujeni kannalta ja saan kiittää Avataria siitä, että pääsin yli nihkeydestäni cossailla poikahahmoja. Sokan puvut olivat myös aivan ihastuttavan simppeleitä ja nopeita valmistaa, minkä vuoksi niitä tuli tehtyä jopa kolme kappaletta. Tai no, lähinnä en vain saanut Sokka-cossailusta tarpeekseni. Sokkaa on kyllä tultu cossattua niin valtavasti tänä vuonna, että se jää nyt kaappiin, jos nyt ei kokonaan eläkkeelle niin ainakin pitkälle tauolle (lukuun ottamatta vielä yhtä viimeistä tilaisuutta tänä talvena).
Mako (The Legend of Korra) oli omalla tavallaan myös aivan järisyttävä aluevaltaus - tai ei sentään valtaus, pikemminkin aluetestaus hieman miehekkäämpien poikien parissa. Vaikka en ole rehellisesti sanottuna ihan sillä omimmalla mukavuusasteella Makoa cossatessani, on hahmo niin käsittämättömän tärkeä, etten voinut jättää välistä. Toivon saavani tilaisuuden cossata Makoa uudestaan ensi vuonna.
Kaiken Avatar-cossailun lomassa valmistelin Pariyaa pitkin vuotta syksyn WCS-karsintoja varten ja vaikka kisoihin osallistuminen hermostuttikin, oli ihan hurjan mielekästä tehdä pidemmästä aikaa puku, joka vaati oikeasti enemmän aikaa ja vaivaa kuin muut "peruspuvut". Vielä puku vaatii mielestäni työstämistä, mutta olen aikaansaamaani kyllä varsin tyytyväinen.
Tämän vuoden lempparipuku on ehdottomasti Pariyan kokonaisuus, mutta Sokka vetää kyllä maton alta, jos pitää päättää vuoden lempparihahmo.


Muita käytettyjä pukuja tänä vuonna taisi olla neljä kappaletta, jos en ihan väärin muista. Vuonna 2010 tekemäni Velvet (Odin Sphere) sai uuden kierroksen kesällä joillakin parannuksilla, mm. vaihdoin hunnun pitsin kokonaan uuteen, paremman malliseen, vahdoin hupun ja hunnun softistähden pvc-muovista tehtyihin, muotoilin lanteelle laskostetun kankaan uudestaan, tein sukkiin uuden röyhelöt ja käytin puvussa pidempää peruukkia, joka laskeutui paremmin hupun ulkopuolelle. Lisäksi lisäsin pukuun joitakin pieniä käyttömukavuutta tai pukemista helpottavia yksityiskohtia. On varsin mukavaa pystyä katsomaan viidwen vuoden takaista pukuaan ja todeta, että hyvin sitä kehtaa vielä tänäkin päivänä käyttää. Peukaloliisaa käytiin pelkästään photoshoottaamassa, Will lähti simppelinä pukuna mukaan Ruotsiin. Kaappicosplayna toteutin Wolfin sarjakuvasta tutun Tainan.


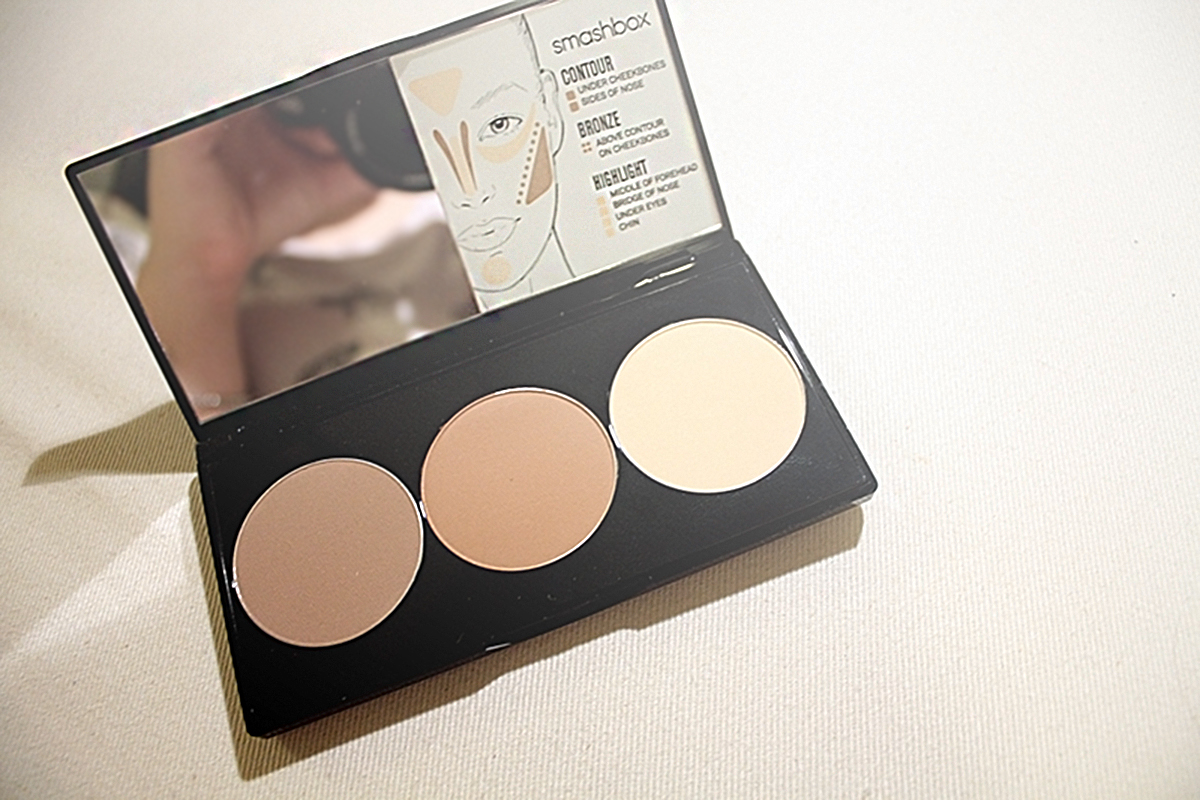
Meikit ja maskitestailut


Tänä vuonna ei tullut tehtyä mitään kovin kummoista, mutta tavallisten tänä vuonna toteutettujen cossien meikkitestien (joita en lisännyt tähän) lisäksi tein myös testejä sellaisille hahmoille, jotka eivät kuuluneet cosplay-listaani, tässä esimerkkinä Vivian ja Snow (The Wolf Among Us). Oli kiva nähdä, miten pienillä jutuilla saisi erilaisia juttuja esiin kasvoista. Kokeilin myös meikkiä Maxille (Life Is Strange), joka on toistaiseksi jäähyllä WCS-juttujen vuoksi, sekä uutta maskia Flemethille (Dragon Age II) sitä odotellessa, että saisin puvun vielä puettua päälleni.


Vuoden suosikkikuvat


Nämä otokset on kyllä sellaisia että itkeä tekisi mieli. AG'n ottamassa talvisessa kuvassa tunnelma on ihan uskomattoman maaginen, ihanan raikas ja kirpeä. Talvisesta keskipäivän jälkeisestä auringosta tuli ihan todella ihanat kontrastiset sävyt ja en kestä mitä taikuuksia AG saa kuviensa kanssa aikaan, herranjumala. Mialiinan nappaamassa kuvassa tunnelma on jotenkin todella pinnassa. Tuntuu älyttömältä sanoa, että tekisi mieli päästä mukaan kuvan hartaaseen tilaan, jossa Pariya tuntuu olevan, kun minähän siinä tilassa olen istunutkin kuvaa otettaessa. Mutta kun tämä kuvan kokonaisuus, apua. Lämpimät sävyt ja iltapäiväaurinko, niisk. Tykkään näistä kahdesta kuvasta myös tosi paljon vierekkäin.


Kilpailut


No pylly, tämän vuoden kisat oli huikeita. Yukiconissa oli ihan huisin kivaa mennä kisaamaan kivalla porukalla Avatar-ryhmänä vähän lennosta ja kaikilla oli kauhean kivaa! Traconin WCS-kisoista en edes ala. Aaaaaa.


Kuva © Teppo Suominen

Tänä vuonna tuomaroin näemmä vain kerran (Popcult), pukudesignkilpailussa. Kokemus oli aivan todella nautinnollinen, sillä kyseisessä kilpailussa se mitä tuomaroin oli juuri sitä mitä opiskelin (ja josta minulla nyt on tutkinto, huraa). Lisäksi mammasin kahdesti (Frostbite ja Desucon). Jos halutaan lisätä mukaan vähän ekstraa, toimin myös juontajan assistenttina Desuconin cosplay-kilpailuissa.


Tuomarikollegoina Yoki ja Shewon

Mamma-Sokka vahtii kilpailun kulkua kulisseista

Mamma/juontaja-assistentti Mako ja ihana Lydia
Kuva © Nyymix


Vuoden 2015 huippukohdat


Koko vuosi hurahti ohi pelkästään ryhmäcossien parissa, mikä on tällaiselta erakkocossaajalta ihan järkyttävä suoritus. Iso kasa uusia cosplay-tuttavuuksia!
Kävion ensimmäistä kertaa ulkomailla coneilemassa! Vaikka kokemus olikin aika pitkälti itkukuoroilua, olen yhtä kokemusta ehdottomasti rikkaampi enkä köyhempi.
Kilpailin ensimmäistä kertaa arvokilpailussa ja edelleen on käsittämätöntä, että siitä pääsi edustussijalle. Olen aiemminkin puhunut ystäville puvuntekoprosesseistani, mutta nyt WCS-pukujen kanssa oli ensimmäinen kerta, kun ihan aikuisten oikeasti suunnittelin pukuja ja toteutustapoja yhdessä jonkun kanssa ja vaikutimme aktiivisesti toistemme pukuihin mielipiteillä, ehdotuksilla ja neuvoilla. Koin tällaisen työtavan hirveän arvokkaaksi.


Suunnitelmia vuodelle 2016


Nyt on ihan rehellisesti sanottava, että WCS-touhujen lisäksi minulla ei ole suunnitelmia. On valtavasti asioita, joita haluaisin tehdä tai saattaa keskeneräisiä pukuja loppuun, mutta en voi asettaa millekään mitään tavoitteita niin pitkään kun kaikki ne monet Japaniin vietävät puvut ovat tekeillä. Todennäköisesti tulen siis kierrättämään paljon vanhoja pukuja tulevan vuoden coneissa. Yksi keskeneräinen puku minulla on tosin jo ihan rimaa hipoen valmis, siitä ei puutu mitään materiaaleja, joten ustaltaisin ehkä luottaa sen debytointiin jo alkuvuodesta. Katsellaan.

Advent Calendar 2015: Window 24

Yumi's picks: Rigid Collodion Scarring Liquid (Mehron)


I dare to say that this thing is the most mind blowing makeup and special effects related product I have had the pleasure to get to know this year. What it is, is a scarring liquid, that actually "carves into" skin. It doesn't build itself on skin like latex etc, that rises higher and higher on skin the more layers you add. Instead, Rigid Collodion does the opposite, as it creates scars like they were actual cuts, wrinkling and "digging into" the skin the more layers you apply. This stuff is a blessing for people who are striving for legit looking scars with ease.


How to use
Apply a think layer of the liquid on dry and hairless area on skin and let it dry. Apply another layer if needed and let it dry again. Repeat this as many times as needed. The more layers you add, the deeper the cut will look. Add in some color with makeup or body paint if you want to. The dried Rigid Collodion is very shiny, so apply a coat of translucent powder on top to get rid of the shine.

My tool of choice
I am not using my makeup brushes for this liquid, but regular different sized painting brushes, depending on the size of the scar I want to create. Sponges are also an interesting tool to use to create scarring tissue different from regular cuts.

Pros
This thing is so amazing and fun! It is so so so much easier to create cut scars with this than with latex or similar stuff. It sticks to skin for hours and hours. You can definitely create real looking scars with this, but you can also use it to create saggy skin, like painting a line down from the corner of your mouth to create a saggy cheek. Definitely a valuable product for aging makeup too, then!

Cons
This isn't a con per se, but the product feels quite odd on skin when applied. It isn't painful at all, but the sensation of my skin forced to wrinkle is weird. :D This is also a liquid that is not advised to use around eyes, nose (the bridge of the nose is fine though) or mouth, so you'll have to figure out an another method to create scars around those areas. The smell of the liquid is very strong and unpleasant, do not sniff it if you want to keep your brain cells.

To see the product in use and to hear tips about using it, check this out!


If you have anything further to ask about this product, don't hesitate to leave a comment!


This has definitely been a different kind of calendar from me this year (and I must apologize for not being able to publish regularly every day, life happened, you know) and I hope this has been helpful to at least some of you. These have been some of my favourite products, but if you have any favourites of your own which you'd like to recommend, please do so! I am always eager to know about makeup products and hear some reviews!

Thanks for the ride!

torstai 24. joulukuuta 2015

Advent Calendar 2015: Window 23

Yumi's picks: Colour Quench Lip Balm, 16 Candy Rose (Clarins)


This is one of those makeup products that I just got somewhere, tried it and liked it. It is a pigmented lip balm, and this is usually the lip makeup I use when I cosplay female characters - unless they are kids or have some specific colored lips, that is. It is a way to put more color to my lips and bring them forward even if the character is supposedly not wearing any makeup on her lips.


How to use
Apply the product on bare lips

My tool of choice
I prefer using the slanted applicator of the tube

Pros
I really like the strongly pigmented color and this lip balm smells really nice and sweet. I would actually call this a lip gloss instead of lip balm, but this does moisturize lips and doesn't dry them out unlike many lip glosses. And it is not sticky. The slanted applicator makes it easy to apply, as it fits on lips well.

Cons
The scent is rather strong, though it softens with time. I don't mind it really, but if you are sensitive to scents, this might not be your thing.


If you have anything further to ask about this product, don't hesitate to leave a comment!

Advent Calendar 2015: Window 22

Yumi's picks: Aloe Lips (Forever)


My forever favourite lip balm ever. Really, ever.


How to use
Apply the lip balm on bare lips to help with dry and chapped lips.

My tool of choice
Straight from the tube

Pros
So soft, so light, so gentle! This lip balm is a combination of aloe vera, jojoba oil and beeswax, yay for natural ingredients. My lips are so soft and smooth after using this. It is also suitable to help with bug stings!

Cons
Absolutely none, in my opinion!


If you have anything further to ask about this product, don't hesitate to leave a comment!

Advent Calendar 2015: Window 21

Yumi's picks: Coconut Oil Sugar Scrub


This time I will not be presenting any specific brands but a little gimmick for homemade face scrub. What you need is fine sugar and coconut oil. That's it. You can actually do this with other similar materials, like brown sugar and olive oil, but I prefer fine sugar because the texture fits well to my skin and I find coconut oil more gentle and I enjoy the scent.


How to use
Use warm water to wet your face. Mix a little bit of oil and sugar and gently massage the mixture on your face in circular motions for one minute. Avid scrubbing around the eyes because the skin is very sensitive around that area. Rinse the scrub of your face properly and finally moisturize your face. The point of scrubbing your face is to get rid of dead and dry skin, make blood flow better and they are also supposed help with blackheads. Don't scrub your skin more than once or twice a week to let your skin rest and to prevent it from getting irritated.

My tool of choice
Well, my hands

Pros
This scrub is a really gentle and an affordable way to treat your skin. At the moment I am going through a treatment that makes my skin unbearably dry and itchy, but this homemade scrub makes it so much better and my skin is so soft for a couple days afterwards. With less dry skin the results are more long lasting. Using a scrub made of everyday food ingredients is less harmful than "cosmetic scrubs" because they are pretty much free of chemicals.

Cons
Honestly, can't think of any if used properly.


If you have anything further to ask about this tip, don't hesitate to leave a comment!

maanantai 21. joulukuuta 2015

Advent Calendar 2015: Window 20

Yumi's picks: Step-By-Step Contour Kit (Smashbox)


I had tried to find myself a nice powder contour kit for a long, long time and finally I came across this one on a cruise a few weeks back. I needed to have a contour kit with a cool enough contour shade. Every shade I had found so far had been too warm, more like a bronzer than a contour shade, which are supposed to be cool, or at least neutral brown on skin. So yeah, there I was, standing in the cosmetic shop staring at this one, the one with a cool contour shade, a light highlight shade, and hey, a bronzer too! I basically grabbed it and ran away immediately as soon as it was paid for. Thanks, mom! 


How to use
Basically, bronzer is for bringing warmth to your skin. Contour shade is for bringing more shadow to the areas where shadows naturally fall and to "hide", like contouring under your cheekbones makes your cheeks seem more sucked in. Highlighting is for, well, highlighting something and bringing it forward. Contour and highlight is a detailed thing to explain, and I'd prefer guiding you to a site with instructions to the magic of it. I'll let the lovely Kandee Johnson explain!

My tool of choice
Some more of my Real Technique brushes. Here are a domed shadow brush (purple), setting brush (pink), contour brush (lower orange) and buffing brush (upper orange). There are different sizes for different areas, like the setting brush fits really nicely under the eyes and the contour brush is nice under my cheekbones.

Pros
The colors are pigmented, yet soft and gentle. It is rather easy to apply and build up layer by layer. All these shades are matte, which I love. This is an amazing kit to just grab along. The package comes with a leaflet filled with instructions for contouring different face shapes, which is surely helpful to many. A basic (removable) instruction sticker is also taped on the mirror of the case, so it is always on plain sight if needed. The package also comes with an extra contour brush, nice.

Cons
The case is quite pricy. The contour brush is rather average, just a standard brush, (though it's always nice to have some extra brushes). Though I love the matte shades, I think the highlight could be a teeny tiny bit more satin like, so skin would get a bit more life to it. But this I find to be a minor detail.


If you have anything further to ask about this product, don't hesitate to leave a comment!

sunnuntai 20. joulukuuta 2015

Advent Calendar 2015: Window 19

Yumi's picks: Colour Corrector Stick: The Reducer (Max Factor)


I decided to try my hand on some redness reducing makeup, and picked up this stick by Max Factor. The brand has five different sticks like this, all having a different effect on skin. Where this light green stick neutralizes redness, like blemishes, blotchiness and broken veins, the others brighten, illuminate, balance or revitalise skin.


How to use
Use this product before foundation, under all makeup. Apply to the area that needs color correction and gently blend the edges out. When the red areas have been covered, apply foundation normally. 

My tool of choice
The stick to apply makeup, my pinkie or a small makeup brush to blend out

Pros
This stick looks like a crayon and it is so cute I could just eat it up! The packaging is quite handy; you can roll more product out by twisting the end of the stick. I like the way this color corrector is more balmy rather than powdery, as it fits better for drier skin like mine.

Cons
For its size, there is quite little of the product inside the stick.


If you have anything further to ask about this product, don't hesitate to leave a comment!

Advent Calendar 2015: Window 18

Yumi's picks: 180 Color Eye Shadow Set (Eleven)


As an artsy person I really need to have a wide variety of different colored eye shadows I can play around with, and a few years back I found this case. It has 180 different colors, divided into two layers in three sections. Whoa!


How to use
Apply a thin layer of primer on your eye lids, then apply the eye shadow.

My tool of choice
Once again, presenting my Real Techniques brushes for eye makeup. From from down upwards, brow brush, deluxe crease brush, accent brush, base shadow brush, essential crease brush, and another base shadow brush.

Pros
So many colors to choose from! Matte colors, shimmery colors, glittery colors, heavily pigmented colors and sheer colors. With proper priming, the eye shadows stay put for hours. The palette was fairly affordable for a big palette as this. The case is quite pretty and the mechanism inside is nifty.

Cons
The case is somewhat fragile and the hinges of mine broke while traveling. I recommend handling it with care.


If you have anything further to ask about this product, don't hesitate to leave a comment!

Advent Calendar 2015: Window 17

Yumi's picks: 2000 Calorie mascaras (Max Factor)


I like to curve my eyelashes, but some mascaras make the effort absolutely pointless, as they make my eyelashes straight again for some reason. Applying mascara on the lower lashes first and on the upper lashes after helps to some extent, but not always. I guess my lashes are strong willed, haha. But yeah, because of this I have had to test quite many mascaras, to find the right kind that keeps my lashes curled, and also doesn't smudge or fall off. So far the 2000 Calorie line from Max Factor has been a pleasant find. There are three different kind of mascaras in this particular line: Curved Brush Volume & Curl for curly lashes (the one with red marks here), Dramatic Volume to add volume (with golden marks) and Waterproof Volume for waterproof lash makeup (with blue marks). All of the mascaras are supposed to create voluminous results.


How to use
When you pull the brush out of the tube, scrape the excess mascara off the brush. Having too much mascara on the brush will make your lashes look clumpy. Apply mascara to the lashes by placing the brush at the base of your lashes and wiggling it from side to side as you bring it up.

My tool of choice
The original brushes of the mascaras

Pros
I do think these mascaras make my eyelashes look thicker. The color is nice, black is rich black. They have the ability to keep my lashes curled, even if I'm not using the Curved Brush Volume & Curl mascara. They stay on their place and don't smear. I can only speak for the curly and waterproof mascara as I don't own the plain volume mascara, but I find the size and texture of the brushes very nice, they are not too big or too small, so they don't make a mess and it doesn't take long to apply mascara.

Cons
Hmm, I'm not sure if I can think of any proper ones?


If you have anything further to ask about these products, don't hesitate to leave a comment!

torstai 17. joulukuuta 2015

Advent Calendar 2015: Window 16

Yumi's picks: Beautyblender


I have mentioned this as my tool of choice once or twice in this calendar, but it deserves its own window. Beautyblender is a dupe which has gained reputation as the leading dupe brand in the makeup industry. There are a several colors to choose from, but the bright pink sponge is the most recognized one.


How to use
Place the beautyblender in warm water and let it absorb as much water as possible. This way the foundation doesn't get in the sponge and stays on the surface. Ring out the sponge until it is damp. Finally, you can start dabbing the foundation on with the sponge. You can also use this for blending only, if you prefer applying foundation contour and highlights with other tools.

Pros
It is almost fluffy-like and significantly softer than any other dupe. It blends makeup with care. It is also suitable for dry skin, as it is softer on skin than regular sponges and it doesn't tear or irritate skin. It doesn't absorb quite as much makeup as other sponges might, and your makeup products will last longer before running out. Even though the color of the sponge is very vivid, it doesn't transfer on skin or alter the color of applied makeup. The shape of the sponge enables it to get to the smaller nooks and larger areas of the face.

Cons
The sponge is expensive, no running away from it. Because of its light texture, it is important to clean after every use. This is to make it last as long as possible, and to avoid spending another large sum of money for the next sponge too soon.


If you have anything further to ask about this product, don't hesitate to leave a comment!

keskiviikko 16. joulukuuta 2015

Advent Calendar 2015: Window 15

Yumi's picks: Cake Make-Up, J3 (Grimas)


This thing, you guys. This thing. I came to know about this product when I was getting myself ready to cosplay Sokka the next day and I noticed that my self tan mousse had expired. A friend of mine was staying at my place and she had this thing called cake make-up by Grimas with a correct shade and she offered to lend it to me. I fell in love and had to get one for myself.


How to use
Before using this product, your skin has to be oil-free. Activate the product with a little bit of water. A good way to do this is to spray a couple of squirts on the product. Avoid using too much water since that way the foundation might look muddy on skin. After activating the product, apply it on skin with a sponge or a foundation brush. Set with a bit of powder if needed.

My tool of choice
A regular makeup sponge

Pros
It is lightweight, yet it covers extremely well, and it makes skin tone really even. It is not shiny on skin at all. It doesn't crease or melt, and usually it stays in place even without setting powder too. This foundation is very ample and it stays in good shape for years. The quality-price ratio is good.

Cons
Some of the lighter shades are not as concealing as the others.


If you have anything further to ask about this product, don't hesitate to leave a comment!

Advent Calendar 2015: Window 14

Yumi's picks: Translucent Powder (Kryolan)


Whenever I am using heavier makeup with contouring, body paints or special effects, I use translucent powder instead of regular "beauty makeup" powders. The powder itself is white, but once it's applied on skin, it's transparent. Because of its transparency it is suitable for any skin tone. There's quite a lot of variety between brands, but I have found myself using a powder from Kryolan, which is a makeup manufacturer specializing in film, television and theater industry.


How to use
Translucent powder is mainly used to set makeup and reduce shine. Apply this loose powder with a brush. Avoid applying too much, as a thick layer of translucent powder might make you look notably pale in pictures.

My tool of choice
My duo-fiber face brush by Real Techniques. I find it perfect for a loose powder like this, as it picks up the product very delicately, making it easier to avoid applying too much. 

Pros
This powder is super efficient in removing shine. Even the tiniest amount makes skin matte immediately. The quality-price ratio is good and there is a lot of powder to use for a long, long time. It keeps even the heaviest makeup in place quite nicely.

Cons
This translucent powder is not as fine and loose as it could be and it reminds me of flour a little. (However, because of it's consistency it is perfect for heavy makeup, like body paints.) The container could be designed much better, as the loose powder flies around the case and makes it messy. (I tape the top after using the powder to avoid messy situations when I'm not using it.)


If you have anything further to ask about this product, don't hesitate to leave a comment!

Advent Calendar 2015: Window 13

 Yumi's picks: Velvet Touch Compact Powder, 16 Olivebeige Mist (IsaDora)


Back in the day I had to get myself a powder for tanned skin and finding the right tone was quite a lot of work. All I could find were either too light, too dark, the shades were too warm or the texture was too heavy. Using a bronzer was out of the question, since they were also too warm and usually included a little bit of shimmer. And then I found an amazing powder from IsaDora.


How to use
After moisturizing and hiding the unevennes of the skin (with foundation, concealer, etc.), apply the powder with a makeup pad or a brush.

My tool of choice
I prefer using a big brush (Real Techniques, multi task brush here) to get a natural and sheer outcome.

Pros
The name of the powder doesn't lie: I have never in my life found a more velvety feeling powder than this. After using this product my skin felt smoother and especially my cheeks were like a baby's bum. Even though the texture is fine, it manages to reduce shine nicely. It lasts long on skin and evens skin color. The applicator in the case is not a sponge, but a super soft and fuzzy pad with a nice ribbon to put your fingers into. It fits well in hand.

Cons
If you are looking for a powder with coverage, this one is not for you. This particular powder works only as a finishing powder.


If you have anything further to ask about this product, don't hesitate to leave a comment!

lauantai 12. joulukuuta 2015

Advent Calendar 2015: Window 12

Yumi's picks: China Glaze nail polishes


I don't even know what to tell you here, other than China Glaze nail polishes are my absolute favourite out there. I first encountered the brand around eight years ago when I got two bottles for my birthday, and I have been hooked ever since.


How to use
To make the nail polish last long, paint your nails with a clear base coat before painting with the actual colored polish. Finish with a clear top coat.

My tool of choice
The brush of the nail polish bottle

Pros
There are hundreds and hundreds of different colors! Metallics, mattes, shimmery shades and glittery shades, you name it! They are super easy to apply on and the size of the brush is very convenient. The nail polish stays nice and runny in the bottle for many years without becoming gooy. The polish also lasts very long on nails.

Cons
The nail polishes are a bit pricey. To get a vivid shade you might need two coats with some colors.


If you have anything further to ask about this product, don't hesitate to leave a comment!

Advent Calendar 2015: Window 11

Yumi's picks: Pan Stick (Max Factor)


Many years ago I was searching for a concealer that would really conceal all the spots etc. significantly and make my skin match everywhere when it comes to color. A friend recommended this to me, and once I got to test her pan stick to hide a nasty bruise for a photoshoot, I just had to get one for myself too.


How to use
Apply concealer to your problem areas, aka pimples, dark circles, bruises, etc.

My tool of choice
A regular makeup sponge

Pros
This concealer is high in pigment and conceals amazingly well. It is pretty ample and with powder it stays in place for a long time. The concealer is already very matt on skin, so powder is not needed to block out shine, only to seal the product on skin. The price is average.

Cons
Because of its thick texture, it is not suitable to use as a foundation.


If you have anything further to ask about this product, don't hesitate to leave a comment!

torstai 10. joulukuuta 2015

Advent Calendar 2015: Window 10

Yumi's picks: Tattoo Liner, Trooper (Kat Von D)


This is a freshly new purchase and I tested it out just today, and decided I had to make room for it in this calendar. I have been drooling over Kat Von D's stuff for a long, long time, but because this brand is a bit pricey, and because it is not sold in Finland and it's a bit tricky to find online stores that shipped the brand to Finland with a reasonable price, I had not gotten the chance to get myself something of this brand. But a few recommendations later I just had to get something. And I bought an eye liner.


How to use
Draw a line with the liner across your eye lid, close to the lash line.

My tool of choice
The brush of the liner itself

Pros
The brush is so, so precise I can't even believe it, and you can create the thinnest of lines or thick lines with ease and great speed. It is waterproof and lasts long on skin, so you don't have to worry about watery eyes. It is easy to use because it can be used like a pen. I really love the matt black and silver look of the pen.

Cons
It is quite pricey compared to the average liners. Because it is waterproof and sticks to skin well, it is harder to fix if you mess something up while applying. This is nitpicking, but I would have liked the cap of the pen to be attachable to the end while the pen is in use.


If you have anything further to ask about this product, don't hesitate to leave a comment!

Advent Calendar 2015: Window 9

Yumi's picks: CC Color Correcting Makeup (Natural Code by Lumene)


Woop, I like using cc foundations because I have a bit of redness here and there, and the foundations of Natural Code are quite light in texture, so I have ended up using a cc foundation of theirs.


How to use
Dab the cc foundation on skin after moisturizing.

My tool of choice
A regular makeup sponge

Pros
Affordable, really light on skin, actually evens the skin nicely. It is long lasting and doesn't clog the pores of the skin. The packaging pleases me greatly just because the lid closes really effortlessly.

Cons
At the back of the tube it actually says that the product is supposed to create a matt finish. It is not matt.


If you have anything further to ask about this product, don't hesitate to leave a comment!

Advent Calendar 2015: Window 8

Yumi's picks: Touch of Radiance Matt Powder Foundation (Lumene)


I am such a huge fan of this particular powder, which is actually a mixture of a creamy foundation and powder. However, this product is going to be taken away from the markets by the end of 2015 and will be replaced by a new powder with a new formula and paler tones. Since this powder has served me long and well, and even though it's not going to be available anymore soon, I still want to present it. I really hope the next one is just as good or even better than this one.


How to use
After moisturizing and hiding the unevennes of the skin (with foundation, concealer, what have you), apply the powder with a makeup sponge to get a more concealing outcome, or with a brush to get a more transparent look.

My tool of choice
Mostly, I use a big makeup brush to apply this product, like the multi task brush from Real Techniques here. I also use the flat sponge to cover some areas if needed, like if I have red spots.

Pros
This powder is versatile and actually does what it promises to do. It has a very matt finish and feels velvety on skin. I really like to case, the light rose golden-ish lid with a bit of shimmer. I lasts quite long on skin.

Cons
There could be a wider range of colors.


If you have anything further to ask about this product, don't hesitate to leave a comment!

keskiviikko 9. joulukuuta 2015

Advent Calendar 2015: Window 7

Yumi's picks: Nivea Soft Moisturizing Cream
(Sorry for being a day late!)


I have a pretty tricky skin to work with; my skin is very dry and sensitive, yet the t-zone of my face might be oily from time to time. So yeah, it is a mixture of pretty much everything, and finding a good and affordable moisturizing creams or oils can be a challenge. I need a moisturizer that isn't too thick, so it can absorb into the skin fast and not leave a greasy feeling on skin, and yet the moisturizer needs to be thick enough to moisturize properly. And then this cream came my way. This product is suitable for face, body and hands, but I will present it from the face point of view, as this is a makup related calendar.


How to use
Wash your face, place the required amount of moisturizing cream on your hand and finally dab onto desired parts of your face.

My tool of choice
My hands

Pros
This cream is so soft. So. Soft. It is thick, yet absorbs into skin fast (hence doesn't remain on skin for a long time as a sticky layer of grease like most of the moisturizers I have tried), and makes skin feel hydrated. There are both cans and tubes, and the size of them is really great for travelling. It's amazing that there are creams suitable for face, body and hands, and that it works well for all of them. The look of the packaging is really fresh. Really good quality price ratio.

Cons
I would not use this product for my entire body because the size of the can and the tube is relatively small, and even though it is really affordable, getting a bunch of them would end up being quite pricey. I would love to have a much bigger tube or a can.


If you have anything further to ask about this product, don't hesitate to leave a comment!